
This cake was an unintentional major showstopper at our Christmas party this year. With a dark, rich, moist chocolate cake and smokey gooey marshmallow frosting it was met with many Mmm's of approval.
I just love the gooey insides of a hot marshmallow so I wanted to try making this S'mores inspired cake. I used a beefed up Black Chocolate and Vahlrona cake and then made a homemade marshmallow fluff icing... toasted coconut ribbons in between each layer to help increase the smoky flavour. Since it was Christmas we couldn't run out and get a last minute kitchen torch, but our host, who is a university chemistry prof happened to have one so we toasted it onsite.
Result? Merveilleux
Take the Black Magic Chocolate Cake Recipe and prepare it with an extra two tablespoons of black cocoa. Bake the cake layers a day ahead, wrap it in saran wrap and refrigerate so it is firm and moist. It gets better as the cocoa and coffee flavours deepen. The 'day of' prepare the frosting and assemble as it's best eaten on the same day.
Homemade Marshmallow Fluff Recipe
Ingredients
2 teaspoons Knox unflavoured gelatin powder
2 tablespoons of cold water
6 large egg whites at room temperature
1/2 teaspoon cream of tartar
1 cup white sugar
1/2 cup light corn syrup
1/4 cup water
1/4 teaspoon salt
1 tablespoon vanilla extract
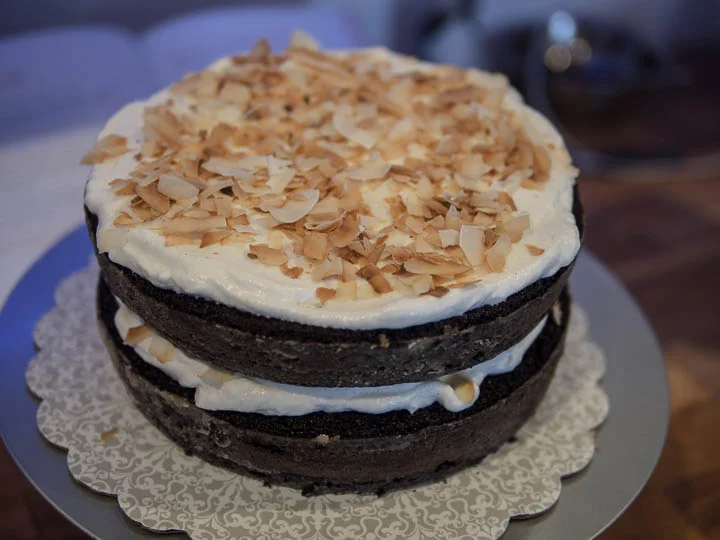
2 cups of coconut ribbons
Toasting the Coconut
Heat the oven to 350 F. Spread the coconut on a cookie sheet. Carefully watch the coconut flakes toast under the oven as they burn quite quickly. You'll want them to have lightly brown tips with most of the flakes still white. It takes around 5 minutes in my oven.
Making the Marshmallow Fluff Icing
Put the cold water into a ramekin and sprinkle gelatin powder over the water. Let sit for around 5 minutes. It should gel up. Set aside.
Here's a little tip I learned from pastry school. Before working with egg whites wash your mixing bowl and all utensils scrupulously until there is not a hint of oil on anything. Oil can kill your whipped egg whites from peaking so do a thorough job. I often rewash my clean utensils in hot soapy water just before I whip to be sure.
Whip the egg whites and cream or tartar together in an electric mixer on high speed until soft peaks form. Should take 2-3 minutes. Turn off the mixer once you've attained soft peaks and focus on your syrup.
In a medium pot, stir the sugar, corn syrup, water and salt over high heat. Bring to 230F, stirring occasionally. You'll need an accurate candy thermometer to measure this. Do not let the thermometer touch the bottom or the sides of the pot or you'll get a false reading.
At 230F, turn off the heat and add the gelatin to the hot sugar mix. Whisk for a few seconds to combine.
Turn on your mixer to medium and drizzle a tablespoon of syrup into the egg whites. You are trying to warm up your egg whites to avoid cooking them. A few seconds later, repeat 6 more times. Add the rest of the syrup.
Whip on high until it triples in size. It should take around 8 minutes depending on the humidity of your home.
Add your vanilla at the last minute and whip to incorporate. I used the Maison Cote two fold vanilla bean paste because the flavour is intense and the little flecks of vanilla beans make the product look more artisan but vanilla extract is fine. I prefer real over synthetic.
Use immediately to decorate your cakes and handle as little as possible.
Heavy cake layers have a tendency to squish the fluff frosting. (I used three full sized layers in the photo, and regretted it). I recommend taking your Black Magic Cake and slice the layers in half so you have 6 thin layers instead of 3 thicker ones.
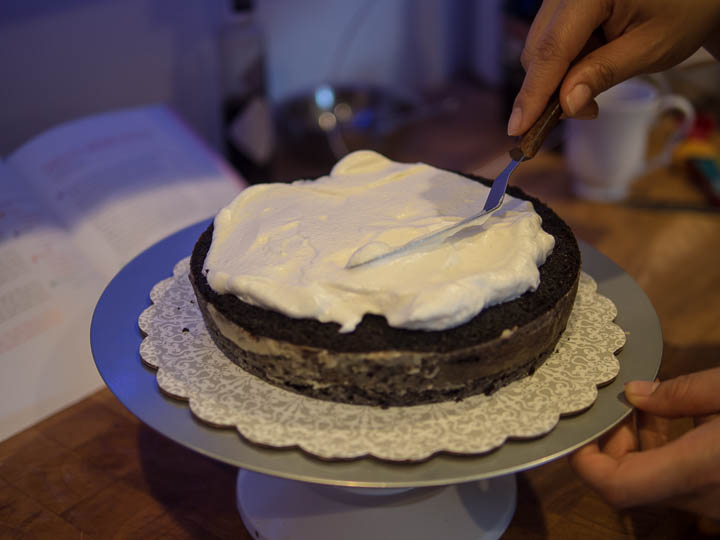
Layer with cake, marshmallow, then toasted coconut and repeat.
If you dusted your cake with cocoa you can leave your sides open. If not, frost entire cake making swirls with your spatula to make it look cute.
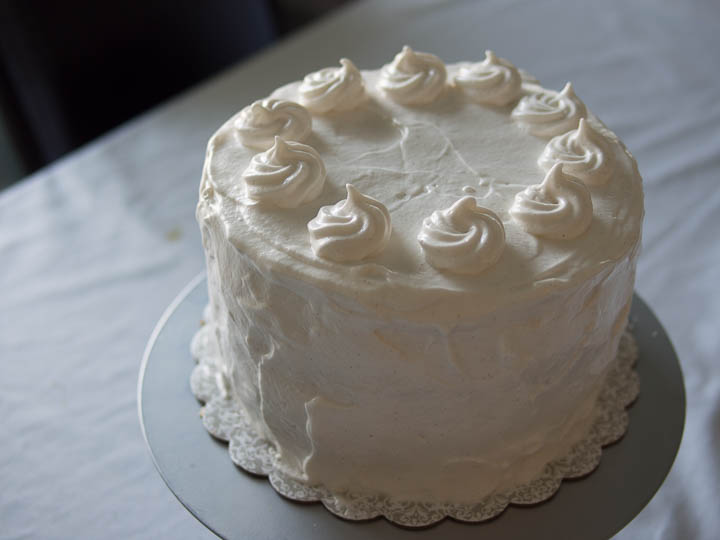
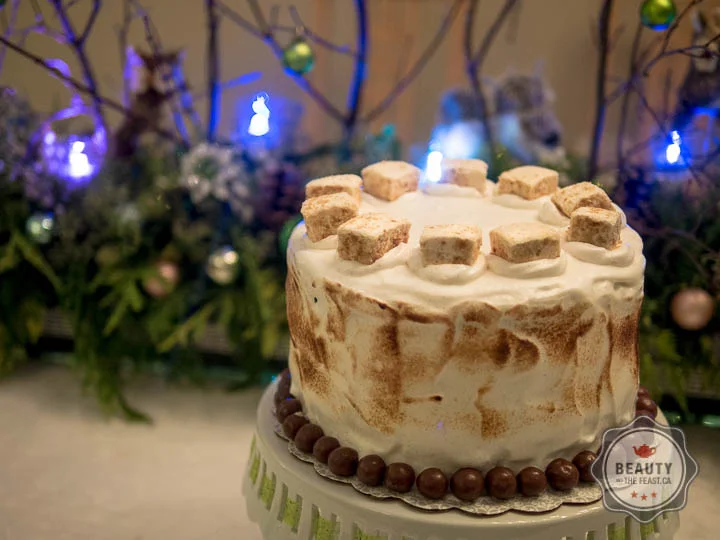
The cake just before toasting with a kitchen torch. It can be served without toasting but the flavour it much enhanced and you get massive "awe" points if you toast it.
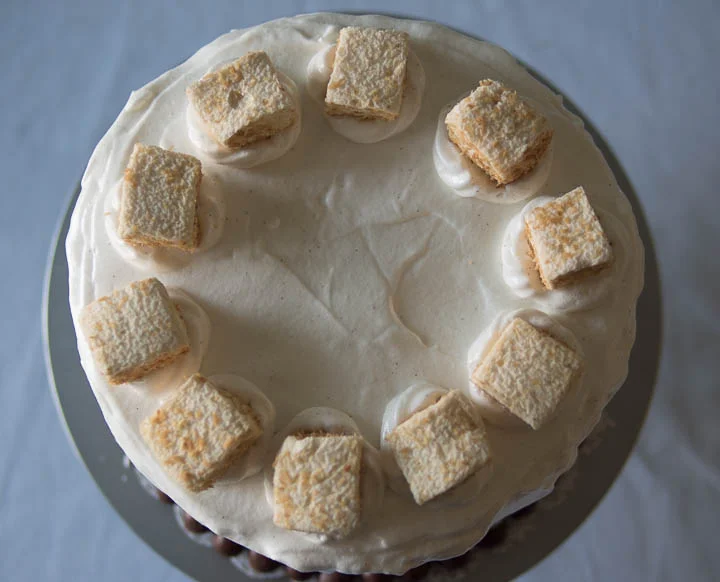
Using an kitchen torch, toast lightly until golden brown. Decorate with some homemade marshmallows and malt balls for more goodness.
TIPS:
If you are making cupcakes, load the icing into a piping bag with a large tip, or just frost with a spatula. Instead of a kitchen torch, pop them into the oven under a broiler, watching closely to prevent burning and melting.
Recipe inspired from: Marshmallow Madness by Shawna Sever. A crazy good book.